behind the light
Video der Uraufführung
Elektronik
Diese Komposition nutzt einen iPad zur Wiedergabe der elektronischen Klänge, die in einzelne Events unterteilt ist. Die Klänge werden vom ersten Geiger mit Hilfe eines Fusspedals gestartet. Dafür kann man entweder ein
- AirTurn PED pedal
oder ein
- BlueBoard mit sustain Pedal
verwenden. (siehe Beschreibung weiter unten)
Es gibt keine weitere Art von Synchronisation bzw. click-track. Ich bevorzuge, dass die Musiker ihren Part interpretieren und die Elektronik an den angegebenen Stellen zu ihrer Interpretation synchronisiert wird.
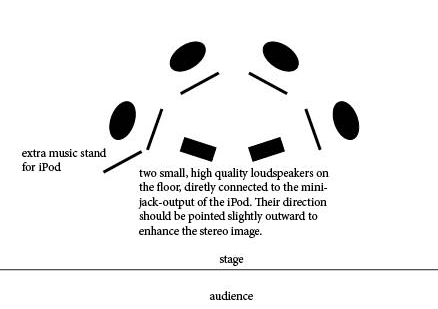
Der iPod sollte auf einem separaten Notenpult neben der 1. Geige aufgestellt werden. Der mini-jack Ausgang wird an zwei kleine, hochwertige Lautsprecher angeschlossen, die auf dem Boden, vor dem Streichquartett positioniert sind. Abhängig von der Akustik sollte man diese beiden Lautsprecher etwas nach aussen richten, um das Stereobild zu verbreitern. Es werden keine Mikrophone oder weitere Lautsprecher im Saal benötigt. Der erste Geiger kontrolliert die Elektronik ohne weitere technische Assistenz.
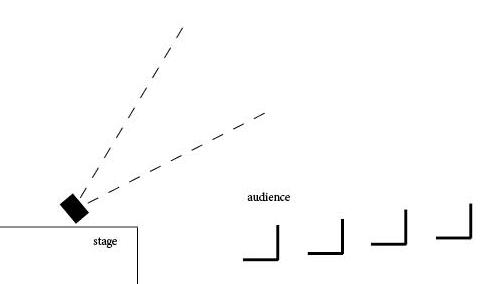
Die Lautsprecher auf dem Bühnenboden sollten ca. 45 Grad nach oben gerichtet werden, um Klänge erst über Deckenpanele oder andere akustische Elemente reflektieren zu lassen. Somit mischen sie sich besser mit den Klang des Streichquartetts. Auch dies hängt jeweils von der Akustik des Saales ab. Es sollte nicht der Eindruck entstehen, dass die Klänge direkt aus den Lautsprechern kommen.
In kleineren Konzertsälen stellen die Fostex 6301B Monitore eine gute Lösung dar.
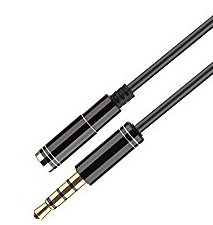
Der mini-jack Ausgang des iPod wird mit einem TRS 1/8 inch -> TRS 1/4 inch Kabel direkt an die Boxen angeschlossen.
installing the software
Download the application ‚behind the light‘ from the Apple AppStore (see link at the end of this page).
After launching it for the first time, the sound files need to be downloaded. Press OK.
iPad interface
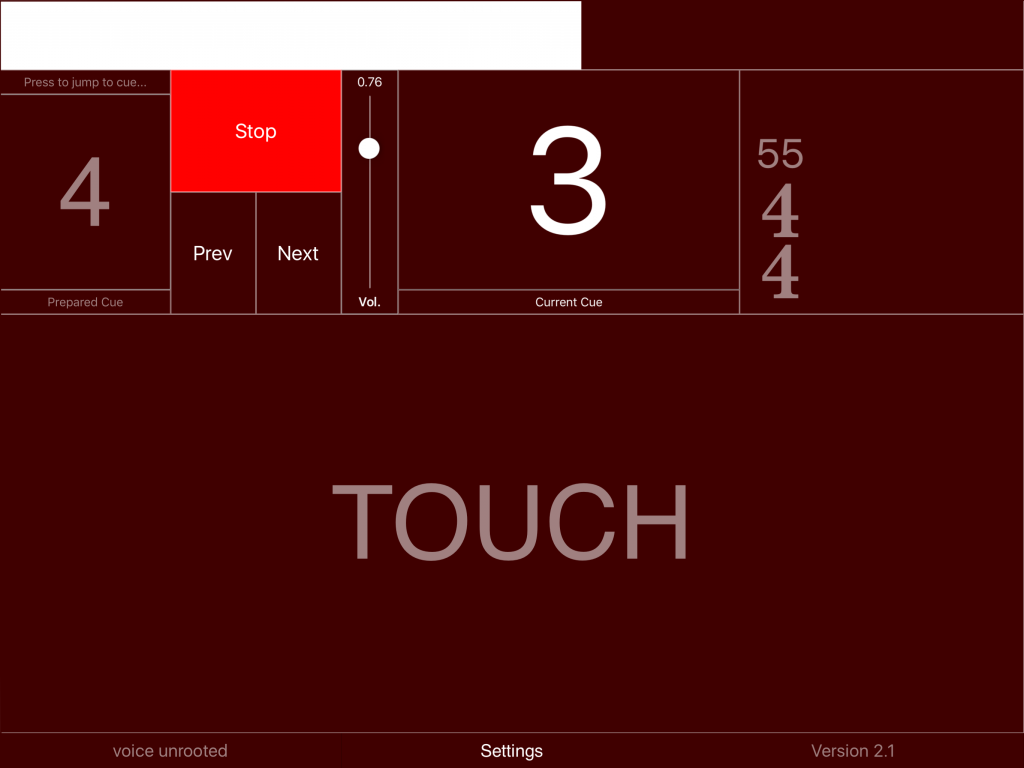
The main screen contains the following elements:
The white progress bar on the top scrolls from left to right over the ‚ideal‘ duration of the event. If the performers choose a slightly faster tempo, the following event can be triggered early. The previous event will fade out to ensure a continuous sound from the electronics. If they perform at a slower tempo, the electronics of the current event will continue for a few seconds. When the quartet reaches the next event in the score, the next event will be triggered and re-synchronizes the electronics to their performance.
After starting an event, the touch button and pedal are disengaged till two seconds before the next event to avoid accidental triggering.
The large number in the upper center indicates the current event.
The ‚prepared cue‘ on the upper left shows the next event to be triggered. Touching the number brings up the cue selection screen to maneuver to a different event during the rehearsal process.
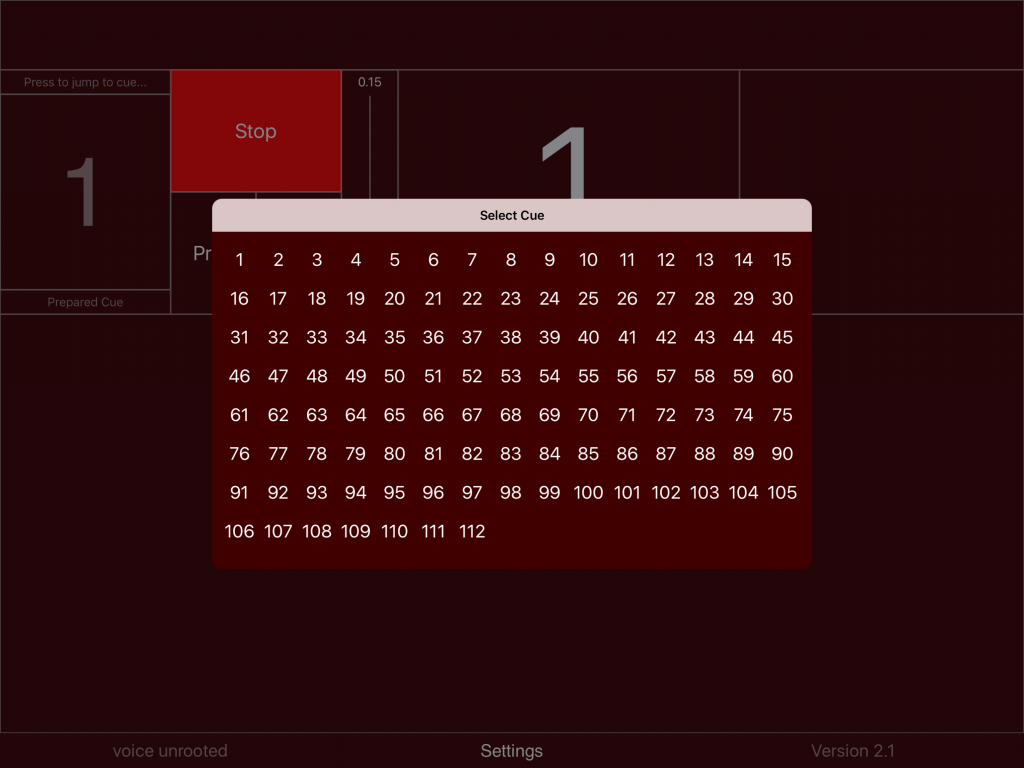
One can also go to adjacent events with the Prev/Next buttons. The volume slider controls the general playback volume.
The upper right area holds information about the bar structure and tempo. It can also be used as a visual metronome, where downbeats flash the full surface of the rectangle with a white color, whereas upbeats only fill the rightmost third of the rectangle. The visual metronome needs to be enabled in the settings dialog (see below).
The application also provides an audible metronome for rehearsal purposes. If activated in the settings (see below), two additional sliders appear at the upper right:
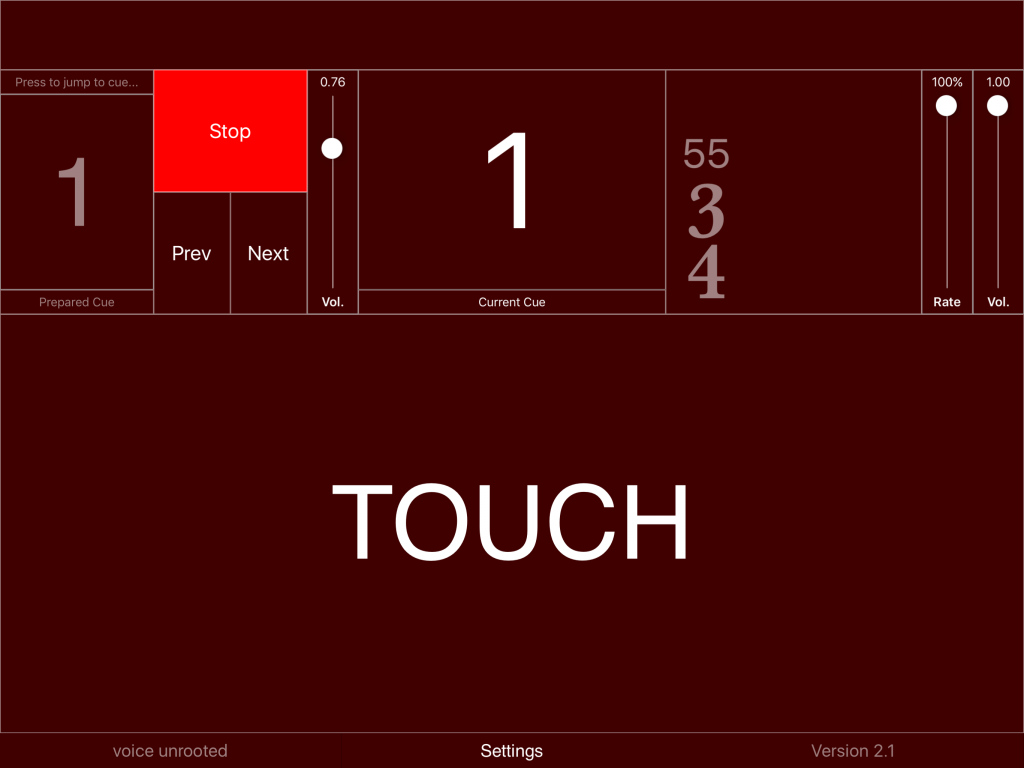
The volume slider controls the volume of the metronome. By bringing the volume of the electronics (next to the stop button) to zero, one can rehearse with the metronome only. The rate slider permits to rehearse at a slower tempo (50-100%). If the rate is not at 100%, playback of the electronics is muted.
Settings dialog
The loudspeaker test should be performed to check that the cabling of the speakers is performed correctly and that both speakers are working. Switching the tuning sound on gives the possibility to tune the iPad to a reference pitch. The next two buttons control the metronome.
Using the BlueBoard with a sustain pedal
One possible way of triggering the sound files is by using the BlueBoard and attaching a MIDI sustain pedal to the external input one.
Start the BlueBoard application before opening ‚behind the light.‘
Calibrate the foot pedal for EXT 1, then open ‚behind the light.‘ Pressing the sustain pedal will trigger the next event as ‚behind the light‘ is listening to the MIDI messages sent from the BlueBoard application.
update events
The electronic score is stored in a database on the device, independent of the sound files. Each event is marked in the musical score with a number. Each event contains the information as to which sound file to play, volume, durations, etc. If corrections to this electronic score become necessary, the musician can download a new database. This provides a possibility for corrections, without downloading the entire application anew. The location of this updated file is known to the application. Thus no further information is necessary. Just press the button and wait for the confirmation message. For the update to work, you need obviously a connection to the internet – through the phone provider or WIFI.
update sound files
Similarly to the events, sound files can be updated to the latest version.
downloads
parts:
behind-the-light_Violin1
behind-the-light_Violin2
behind-the-light_Viola
behind-the-light_Cello
download app from app store
Programm behind-the-light im iTunes AppStore

